Effective and efficient automated tests allow you to sleep well at night.
It gives you a whole lot of confidence that your application works and reduces the time it takes for a human user to manually test your application from the beginning to the end.
Automated testing can cut your testing time by 90%, for example, if it takes a human 3 hours to test an app, it should take your automated tests just a few minutes to do the same. And most importantly, it allows you to find bugs and fix them before it gets to your users.
In this article, we'll explore how to test your application's UI with Puppeteer headless browser and the Jest testing framework. Let's get started already.
Setup
First off, let's set up the Svelte sign-up form we intend to test. We'll use the Svelte Kit to set up the project.
Run the following commands to create a boiler-plate Svelte application with Svelte Kit and run it.
npm init svelte svelte-signup-app
cd svelte-signup-app
npm install
npm run dev -- --open
After the installation, open the routes file and add a signup route. Add the code below to the signup route file as well, src/signup.svelte:
<script>
import { useForm, validators, HintGroup, Hint, email, required } from 'svelte-use-form';
import '../signup.css';

const form = useForm();
</script>

<form use:form>
  <h1>Signup</h1>
   <label for="Email" class="label-email">
    <input
     type="email"
     use:validators={[required, email]}
     class="text"
     id="email"
     name="email"
     placeholder="Email"
     required
    />
    <span class="required">Email</span>
   </label>

   <HintGroup for="email">
    <Hint on="required" class="email-required-hint">Email is required</Hint>
    <Hint on="email" class="email-hint" hideWhenRequired>Email is not valid</Hint>
   </HintGroup>

   <div>
    <label class="label-password">
     <input
      type="password"
      class="text"
      use:validators={[required]}
      name="password"
      placeholder="Password"
      id="password"
      required
     />
     <span class="required">Password</span>
    </label>
   </div>

   <Hint for="password" on="required" class="password-required-hint">Password is required</Hint>
   <div>
    <label class="label-password">
     <input
      type="text"
      class="text"
      name="password"
      placeholder="Password"
      id="password2"
      required
     />
     <span class="required">Password</span>
    </label>
   </div>
   <Hint for="password" on="required">This is a required field</Hint>

   <input type="submit" disabled={!$form.valid} id="submit" value="Signup" />
</form>

<style>
 :global(.touched:invalid) {
  border-color: red;
  outline-color: red;
 }
</style>
Noticed that we are using svelte-use-form plugin in the form route, right? It's a better way to validate and work with forms in Svelte. Let's install it by running the command below:
npm install svelte-use-formYou can also include this CSS file so we can have the same design as shown below.
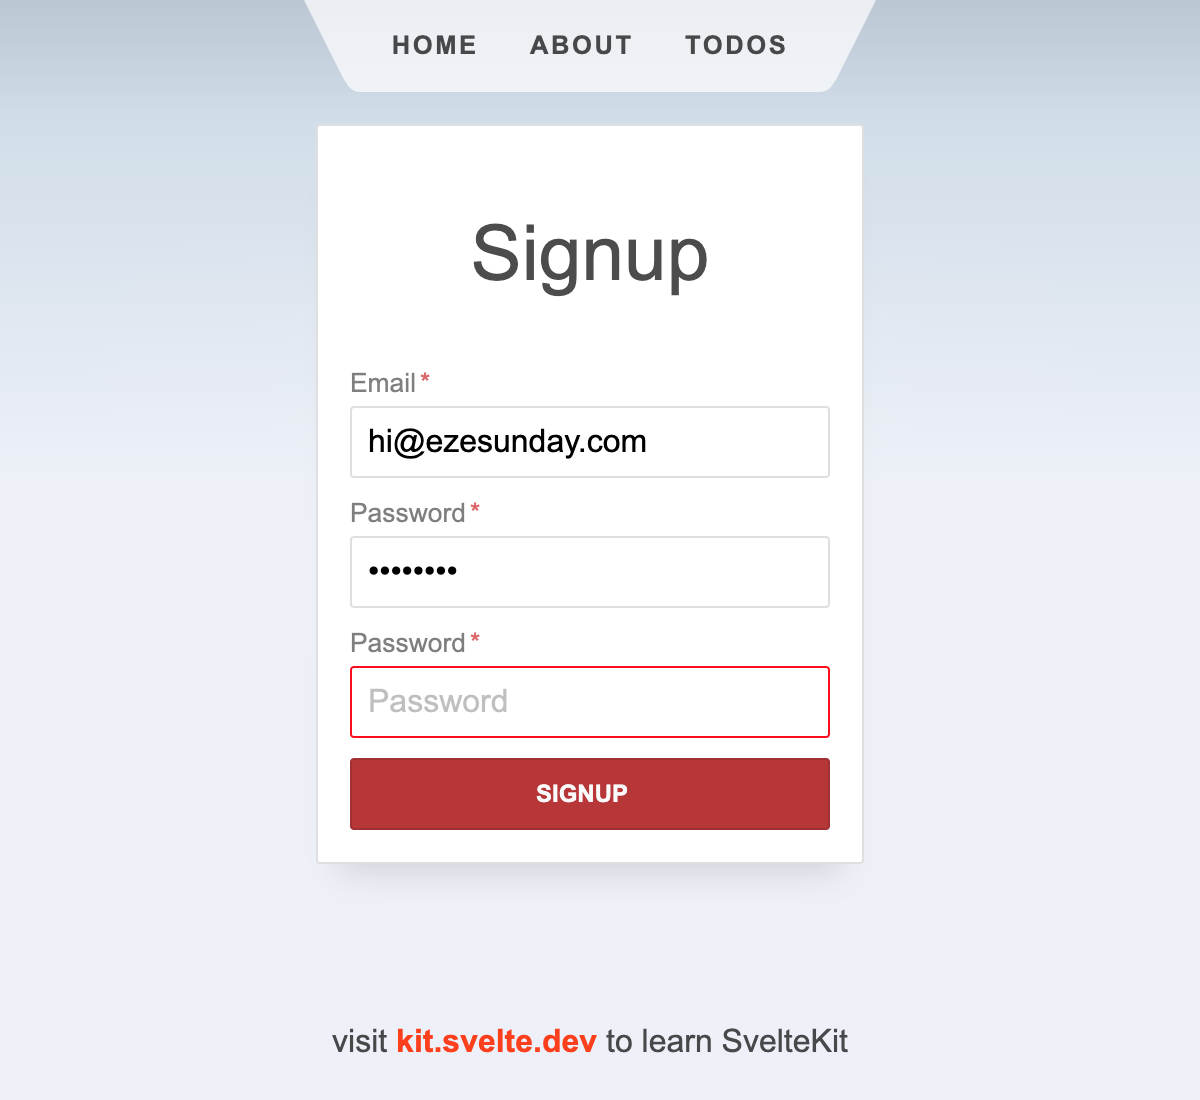
Next, let's add and configure Jest and Puppeteer. We'll install both of them as NPM packages using the command below:
npm install -D jest jest-puppeteer puppeteerJest is a Javascript testing framework, we'll use Jest for assertions while we use Puppeteer, a headless Chrome browser, to navigate through the UI. To use Puppeteer with jest for testing we've added a supporting package, the jest-puppeteer package.
Create a jest.config.js file and add the following configuration to it:
export default {
    preset: 'jest-puppeteer',
    globals: {
        URL: 'http://localhost:3000',
    },
    testMatch: ['**/test/**/*.test.js'],
    testTimeout: 8000,
};
If your application's base URL is not localhost, feel free to change it. If you want to add more configurations to your jest config file, you can check the Jest config documentation. For now, this will be enough for this illustration.
The globals configuration option in the Jest config allows you to set config options that will be available across the test environment like the URL we just added to it.
testTimeout defines the maximum time it should take your test to complete start and run completely. If the time is not enough your test will likely fail as shown below --- in the example below, we used 50 milliseconds which will end before the test even starts. The default timeout is 5000 milliseconds. If you believe your test will take more time to set up and run, please feel free to increase it.
Let's configure jest-puppeteer to work with our setup, by creating a jest-puppeteer.config.js file and adding the following code to it:
export default {
    launch: {
        headless: process.env.HEADLESS !== 'false',
        slowMo: process.env.SLOWMO ? process.env.SLOWMO : 0,
        devtools: true,
    },
};
For details about the parameters above take a look at the jest-puppeteer documentation.
That's all there is to setting up Jest with Puppeteer. Now, let's test the signup form.
Write the test
Create a test directory in the root of the project, create a test file (app.test.js) in the test directory and add the following code:
beforeAll(async () => {
    await page.goto(URL, { waitUntil: 'domcontentloaded' });
});

describe('Header Testing', () => {
    test('Page title', async () => {
        const title = await page.title();

        expect(title).toBe('Home');
    });
});
This is our first test. It'll test that our page title is as we expect it to be.
Next, we'll navigate to the signup route and test our input fields to endure that they are not allowed to be empty before they are submitted to the server.
describe('Signup form', () => {
    test('Test invalid email', async () => {
        await page.goto(`${URL}/signup`, { waitUntil: 'domcontentloaded' });

        await page.waitForSelector('form');
        await page.type('#email', 'eze');
        await page.click('body');

        const emailHint = await page.$eval('.email-hint', el => el.innerHTML);
        expect(emailHint).toBe('Email is not valid');
    });
});
In the above test, we are making sure that the submitted email is valid. If our application's validation stops working this test will fail and we'll know we need to fix something.
Also, below is another test to make sure that the email field is not empty. First, we navigate to the signup page with the page.goto method, then wait for the form selector, select the email field and type nothing into it and then click outside of the field if everything looks good, our validator does nothing, otherwise, it returns an error. That's basically how a user is expected to behave while filling the form.
describe('Signup form', () => {
    test('Test empty field hints', async () => {
        await page.goto(`${URL}/signup`, { waitUntil: 'domcontentloaded' });

        await page.waitForSelector('form');
        await page.type('#email', '');
        await page.click('body');

        const emailHint = await page.$eval('.email-required-hint', el => el.innerHTML);
        expect(emailHint).toBe('Email is required');
    });
});
You can follow the same pattern to test all the business critical UI elements and features of your application.
You can browse and try the sample project's code in this GitHub repository.
Run the test
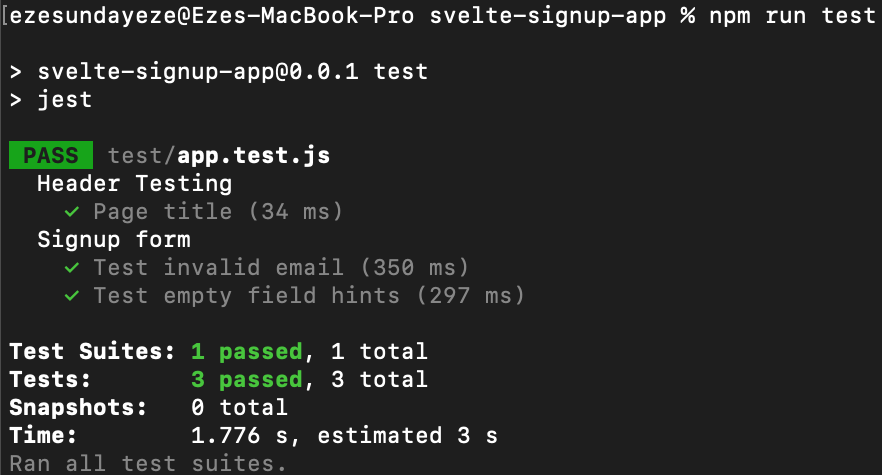
Now, let's run the test with the command npm run test. Ensure the app is already running on port 3000 because Puppeteer will be connecting to the application using that port.
Here is how the result shows up:
Conclusion
The importance of testing your app's UI workflow and interactions can not be over-emphasized. And using Puppeteer to test makes it even more humanly because, you are literally testing the processes your users will likely have to go through to use your app. So, if something breaks, it's easy to figure out in one click.
Happy testing!
